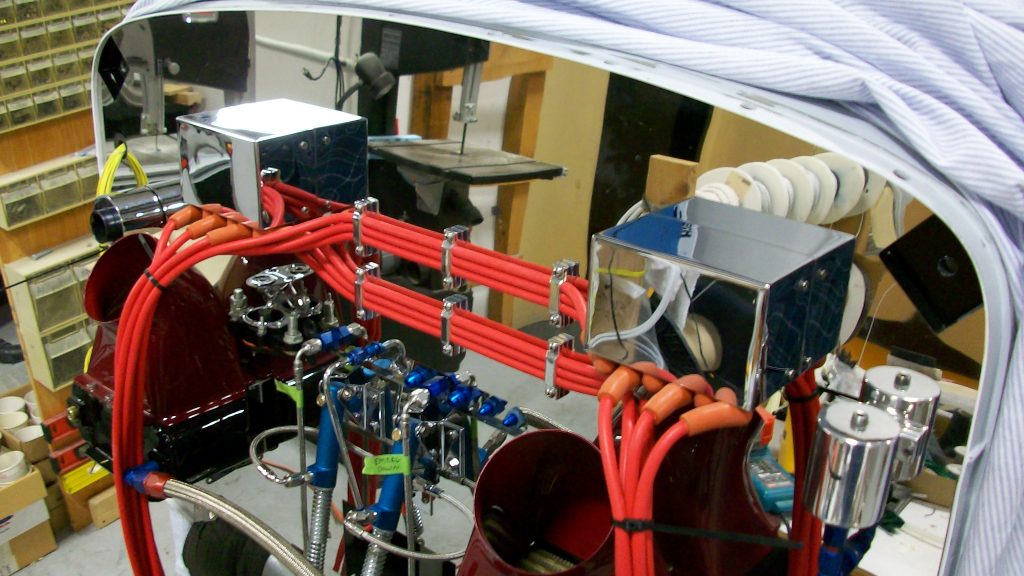
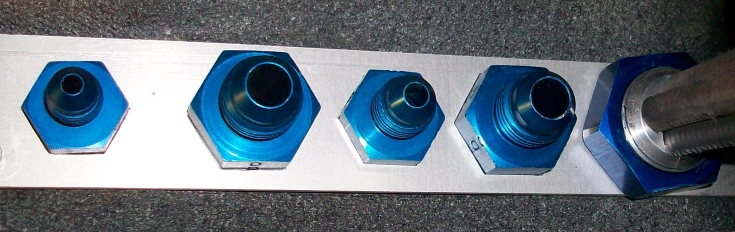
 We wanted to have all the fuel, oil, and hydraulic lines come through the same passthrough area, so we made an oval inset in the firewall centered above the nose wheel well.
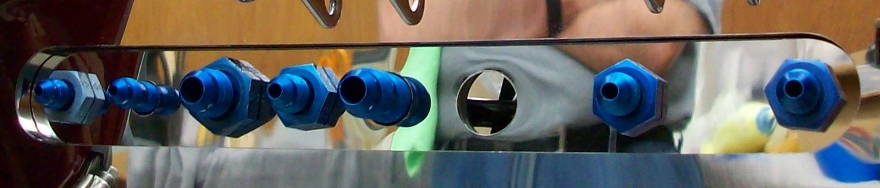
The fittings were inserted from the aft side of the firewall and we fabricated a plate with corresponding hex patterns cut out to prevent rotating of the fitting while tightening and loosening of the lines attached to the fittings. This not only prevented damage to the fitting and the firewall from large lock washers, but allowed for installing the fittings with the least amount of thickness to tighten against. This was important because after securing the fittings with the appropriate nuts on the forward side we put a prefit piece of polished stainless over the securing nut and held the stainless piece on with an additional nut for cosmetic reasons.
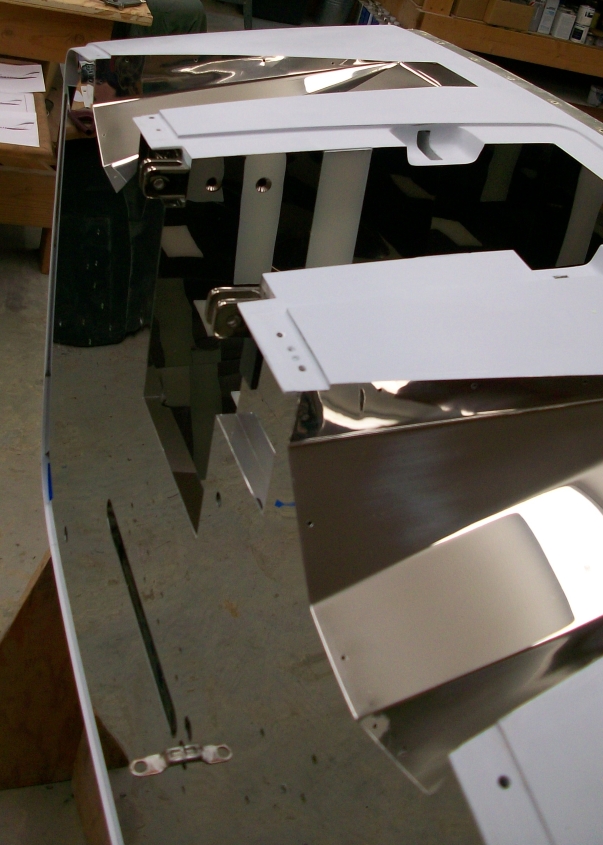
 For the wiring and Starter Solenoid cable passthroughs we hogged out the foam and glass and inserted a high density nylon block with the proper hole drilled inside so the wiring will never press against the fiberglass of the firewall. The hardpoint bonded to the forward side of the firewall for bonding the stainless sheet to was relieved to receive a rubber grommet. The hole in the stainless sheet is much wider than the wiring, but much smaller than the rubber grommet to act as a retainer. There is just enough pressure against the stainless from the grommet to seal it from moisture.
 Several steps went into making the Stainless Sheet Metal portion of the firewall. First, a rough template was made that matched the fuselage flange along the perimeter.
Where possible mounting holes were transferred to the template by drilling through from the aft side of the firewall. Where that wasn’t possible we cut bolts and screws off just past the threads and ground a tapered point to them. We then screwed them into the nutplates and pressed the template in place to mark the hole locations.
Although the fit was very good, it wasn’t good enough for Ron. After that we made small square pieces with holes drilled up and reamed to final undersized dimensions. Using Click-Bond adhesive we bolted each of the squares in place until cured. The end result was a template with each and every hold perfectly press fit to match the mounting holes on the firewall. After that, Ron used the template to match each hole in the stainless sheet with a large selection of Cobalt drill bits that were tossed as soon as they showed any signs of dulling.

 Duraboard insulation was installed in sections with Fire Barrier caulking behind and between each piece This was done for two reasons. One, so that the Duraboard could be inserted behind the flanges of the hat channels we made for bonding the Stainless sheet to and two, so we could have the best fit possible. When working with one large piece if you don’t get it cut just right you have to live with gaps that get filled with caulking. We wanted to keep that to a minimum.
 Bonding the stainless steel sheet to the firewall was as tense an operation as drilling and trimming it was. Maybe even moreso. In drilling and trimming Ron first removed the protective layer of plastic that came with the pre-polished sheet. He then taped the whole thing with two overlapping-at-the-seams layers of tape and then the carefully placed the sheet on a clean piece of particle board and the aluminum template placed on top. After each hole was drilled the template was removed to clear any burs and shavings off. When the work was completed all the tape was removed, the surface cleaned of tape residue, and inspected for scratches etc. before re-taping for the bonding process.
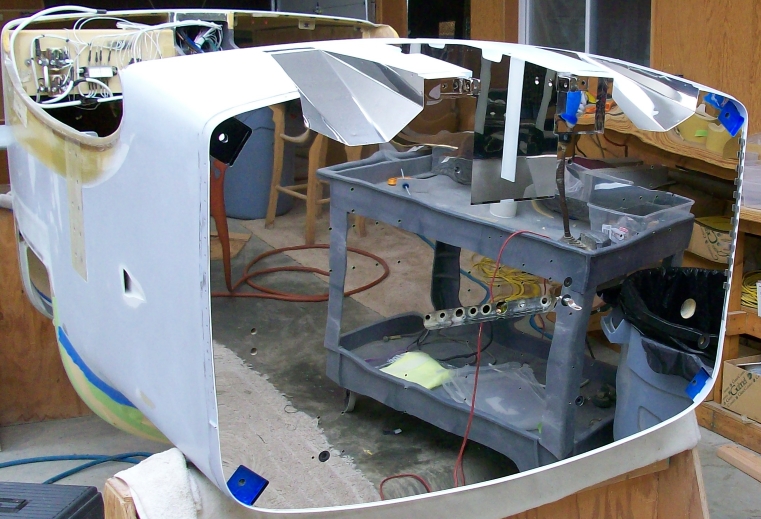
As you can see in the picture, the flange that is exposed beyond the sheet metal is top coat painted and taped off for protection. The engine mount anchor points are painted as well. The nose wheel well and exhaust tunnels already went through this same process to bond the mirror finished stainless sheet metal there as well. I’ll cover that in a seperate post.
 In order to bond the firewall uniformly without distortion we used a sheet of laminate countertop material and a series of through bolts at the engine mount anchor points, the fuel fitting pass throughs and anywhere we could bolt through like the oil cooler mounting locations. This worked out very well. Yes, we most certainly made several dry runs to make sure we had the bolts, clamps, tools, and job assignments down pat. The Click-Bond adhesive we used was a special ordered high temp batch that allowed plenty of working time which we didn’t squander.