
The Firewall was Ron’s baby. We worked in parallel on different tasks and regularly I had a dozen different projects going so that whenever we needed to figure out the best way to do something I could leave one project for a few days or weeks or even months until we came up with a solution we both loved. We were both so picky and compulsive that if one of us didn’t like something there was probably a good reason for it. I pretty much did all the fiberglass work and prep work for the firewall, but Ron did every inch of the sheet metal work, and it was a lot of work.
One day he drove down to Seattle to pick up some sheet metal for the firewall while I stayed in the shop and worked on the plane. The firewall on N35HP was made from aluminum, but was anodized a blue gray color to match the other anodizing we did in the plane. I assumed we were getting a sheet of Aluminum. Ron pulled up to the shop and off-loaded a 12′ x 4′ sheet of polished stainless. This sheet was thick and heavy, but the most beautiful piece of metal I’ve ever seen. It was clearer and brighter than your bathroom mirror with a protective plastic coating. One look at that and we realized there was a lot of work necessary to pull this off without it looking like poo, like a funhouse mirror.
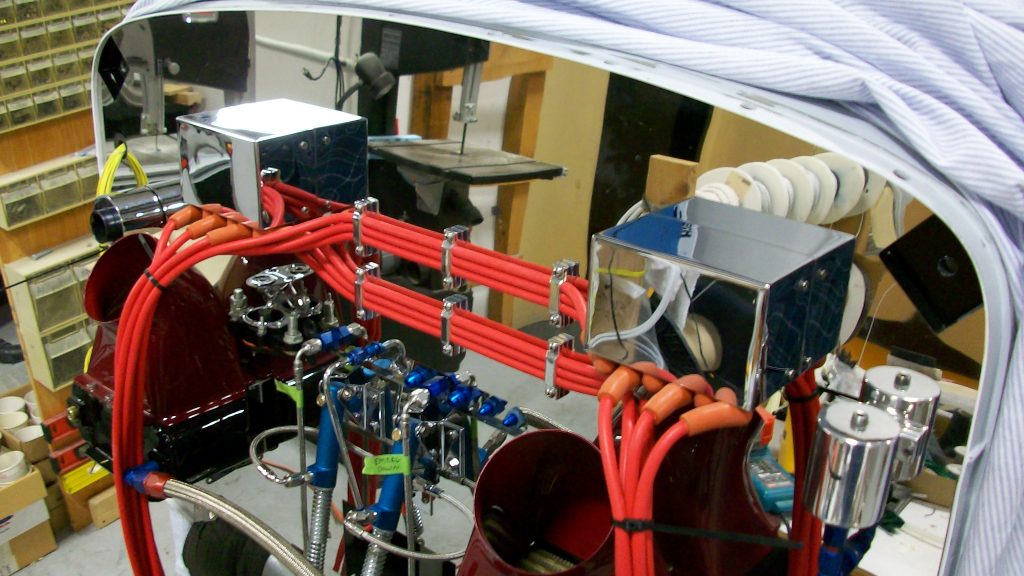
There are some things that need to be pointed out that may be visible in the picture above and many that aren’t. There are no Camloc fasteners protruding through the firewall along the top. There are no pull rivets holding it in place. We used a special high temp formula of Click Bond adhesive and existing fasteners from the accessories mounted to the firewall to hold it in place. The engine mount cross bar does not press against the stainless firewall, and there is absolutely no distortion in the reflection. The surface the firewall is mounted to is perfectly flat, square, and stable. I intend to detail the whys and hows of work it took to pull this off, but it may take a few parts to cover it all.
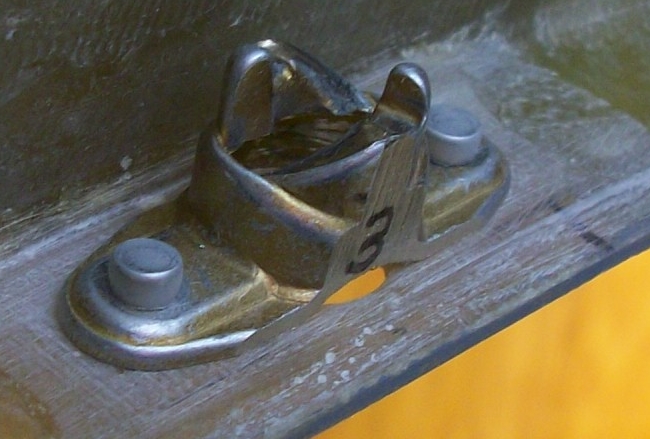 The first thing we did was make the space behind the firewall as thin as possible. We did this by grinding the Camlocs to absolute minimums. As a side note the gray painted edge visible on the cowling attach flange was painted on with a small brush after spraying sandable primer into a Dixie Cup. I did this so I could see the thickness as I sanded it to a uniform thickness all the way around including the center and belly panel seams.
I made a mold for making hat channels to go around the engine mount pads. Using .003″ thick veil cloth I laminated the pads and fit them into the corners making sure they were at the same height off the firewall, far enough to cover the Camlocs, and each one perfectly square to the other three.
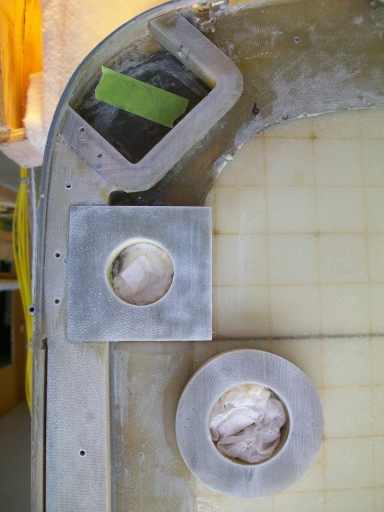
The cowling attach hinges being aluminum were polished requiring removal for repolishing in the future. More important than that, Ron didn’t want the paintjob to go up to a taped off hingeline. We made a doubler plate with nutplates for the small #4 screws that held the hinges instead of riveting the hinge to the flange. After the flange was painted inside and out we slid the hinges into the slot you can see in the picture and secured them with polished stainless steel screws.
Everywhere there was a passthrough or mounting pad we either molded a hat channel to accommodate nutplates or used a hardpoint to bond to or bolt through the firewall. Visible in the picture are the cabin heat passthrough and the wiring passthrough. The hardpoints were made with 20lb. foam sanded down to allow for laminates over the top. The laminates were then sanded with an I-beam level with self adhesive sandpaper on the flats side. If I recall, a standard 4 foot level was too wide so we cut one down on the bandsaw so I could sand across all the hardpoints and corner flanges at the same time. All this glasswork happened over several years as we nailed down the firewall layout and worked on other things. With a shrink rate of around 17%, Vinyl Ester resin changes dimensionally quite a bit over time. That’s not a worry for most things, but when making control surface gaps in the .010″ range and shooting for perfectly flat firewalls, it’s important to let things fully cure over time and then recheck, laminate and sand as necessary.
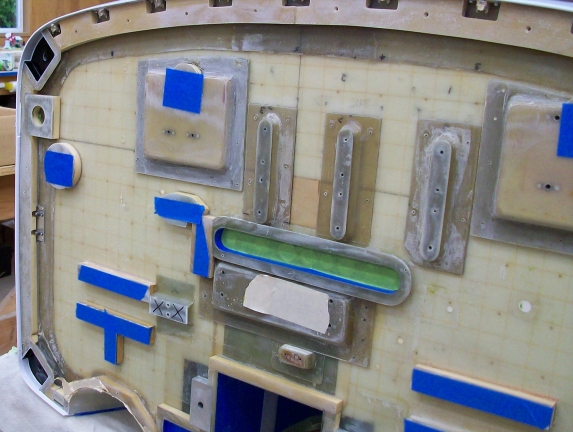
The hardpoints that have nutplates had fire barrier material bonded inside before the hat channels were bonded to the firewall. What you cannot see in the harpoints that cover the Camlocs are a series of small pieces of tubing bonded into the foam so that when moisture gets into the Camloc receptacle it drains away through the tubing and exits at the engine mount attach flanges on the right and left. This was done to prevent moisture from getting into the gaps between the firewall and the Camlocs and then freezing at altitude or in the winter. We were concerned about losing the bond between the firewall and hard points as well as and deformation of the metal that would cause.
That’s it for now. I’ll write more on the modifications to the engine mount, the details around the plumbing passthroughs, and the bonding of the firewall material in the next post.